Media Studies: Audiovisual Production: Fotographics: workings
Contents
“ Nowadays everybody can make a good photograph “
Is this true or should we still make a difference between a picture and a photo.
The digital techniques of today that are built in camera’s see to it that 95% of all photo’s are technically good shots. They are well exposed with good colours and when you have a steady hand they are sharp.
The built in technique sees to all this automatically. A great advantage of these automatic digital camera’s is of course that there is a immediate possibility to check the shot on the lcd screen of the camera. So when the photo is not correctly exposed or does not look quite the way you had in mind you can erase it and make a new photo without loss of material. It will cost you nothing extra and when you have enough memorycards you can make a lot of photo’s with different settings until you have got the right one. Of course the subject must allow this because when you have moving objects or changing circumstances you have a problem. In architecture photography where a static building mostly is the subject this method of working is very possible.
However, to make a really good photograph that really shows what you intend and what you find important in a photo, it is essential that you know what influence the various parts of a camera have on a photo.
- A photo is made by a camera with a lens. There are different kinds of camera’s for different purposes.
There are the “old fashioned” analogue camera’s with film that are hardly used anymore (except by die hards and still some professional photographers who think that the results of the analogue camera’s and film give a better and more beautiful result) and the digital camera’s.
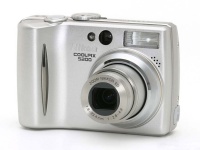
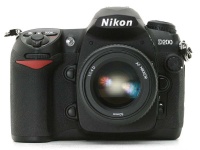
Another difference the automatic compact camera versus the more professional slr or reflexcamera.
- A very important part of the camera is the lens. There are many kinds of lenses that each have there own work field and with that their own function.
- We don’t actually need a lens to make a photo. You can make a camera out of a shoebox with a small hole in one end. This is known as a pinhole camera and this device can actually focus an image and record it on film.
- Light is bent when it passes between substances having different densities. You can see this if you look at an object that is both in and out of water; for example a spoon in a glass half full of water looks bent at the point where it enters the water. Obviously the spoon is not bent; the light reflecting from the spoon is, as it passes from the dense water to the less dense air. The same effect occurs when light passes from the air through a piece of glass. If the glass is curved correctly, as it is in a camera lens, it can bend the light in such a way that an image of the scene in front of the lens is focused behind it.
- The focal length of any lens is the distance between the optical centre of the lens and the point at which it focuses an image. When you use a magnifying glass to focus the light from the sun onto a piece of paper, the area illuminated by the beam will become larger or smaller as you change the distance between the magnifying glass and paper. At the point where the bright circle of light is smallest, the simple lens that constitutes the magnifying glass is in focus. The distance between the magnifying glass and the paper is the “focal length” of the lens.
- To control exposure an aperture is built in the lens. This aperture works together with the shutterspeed control to get a well exposed photo. The aperture controls the amount of light that can reach the film or CCD by changing the opening of the lens. When there is a lot of light you can make the opening smaller so you get the right amount of light together with a certain shutterspeed. When there is not a lot of light, you can open the aperture so more light can reach the CCD or film.
- Shutterspeeds are expressed in fractions of seconds, as multitudes of ½ so that each higher shutterspeed halves the exposure by halving the exposure time. So starting at for instance.
½ sec -----1/4-1/8-1/15-1/30 etc.
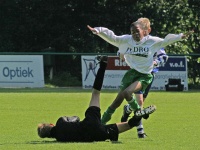
- Just like successive shutterspeeds, successive aperture values halve the amount of incoming light on the CCD. When using reflex camera’s you can always see to it that you can use the aperture and shutterspeed that you want or need in a given situation. ‘’For instance in sports photography you mostly need fast shutterspeeds to catch fast movement and action in focus.’’ If you want to get an impression of movement you can use slow shutterspeeds.
Depth of field
In product or studio photography you will want to control the depth of field. You can do this by selecting the right aperture.
The effects of sharpness or focus, unsharpness and depth of field can be applied very well to get certain results in a photo. To show the things that are important to you. ‘’For instance sharpness all over to get a good impression of a building or an interior. Or selective unsharpness to draw attention to an area in a photo.’’ We can achieve this by using the second important effect of the aperture called Depth of Field.
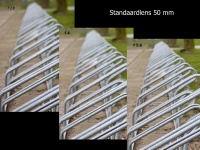
A lens can only bring objects at a single distance from the camera into critically sharp focus. But if you look at photographs, you can see a considerable area of the scene from near to far that appears sharp. Even though theoretically only one narrow space is critically sharp, other parts of the scene in front and behind the most sharply focused plane appear acceptably sharp. This area in which everything looks sharp is called depth of field. Objects within the depth of field become less and less sharp the farther they are from the plane of critical focus. Eventually they become so out of focus that they no longer appear sharp at all.
- The rule with depth of field is that the main focus point lies on one third of the total area that you want to appear sharp. Depth of field goes from 1/3 in front of the main focus point ( towards the camera ), and 2/3 is behind the main focus point (away from the camera).
Depth of field is affected by the aperture, subject distance, focal length of the lens and the film or sensor size.
- A smaller aperture gives more depth of field. Objects within a certain range (1/3 – 2/3) from the main focus point will also appear sharp.
- Coming closer to the subject (reducing the subject distance) will reduce the depth of field while moving away will increase depth of field.
- Lenses with a shorter focal length produce images with a larger depth of field. A wide angle lens gives more depth of field at f5.6 than a telelens.
- Depth of field is a very usefullmeans to get controlled sharpness in a photo to focus attention to a certain area.
Exposure
To measure the correct exposure time the camera has an exposuremeter. Exposuremeters determine according to the available amount of light, the exposuretime and aperture to get a well exposed photo.
- Exposure meters are set to measure an average reflection of light of about 18 percent. This is a middle grey tone. Most of the time this works very well because most scenes have an overall reflectance that average out to middle grey. But some scenes don’t average out to middle grey and then you will have to adjust the measuring.
- In scenes with a lot of white, in the snow for instance, the meter will bring the very bright scene back to average middle grey and so you will end up with underexposed photo’s. The same thing will happen in backlight scenes or scenes with a lot of reflected light. You will have to compensate the exposure time and open the aperture or choose a slower shutterspeed. On the other hand in a scene with a lot of black or dark area’s the meter will overexpose the photo and show the subject too light. Black will look greyish so you have to compensate by choosing a higher aperture.
Lenses
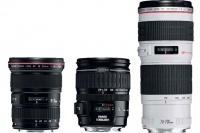
Most digital compact cameras have a zoomlens with a small range of focal length. From a small wide angle to a short telelens. A zoomlens has as great advantage that with one lens you can capture the scene in such a way that all attention goes to the main subject. By zooming in and out you can , without having to go back or forth, frame your image. Thes standard zoomlenses are limited in their use. For architecture the wideangle is mostly not “wide” enough and also the telerange is limited.
More possibilities are offered by the digital reflexcameras with interchangeable lenses. With these lenses the range goes from super wideangle to supertelelenses. In between we have the normal lens with a focal length, in 35 mm format, of around 50 mm. the normal focal length is determined by the size of the film or CCD. So normal in a 6x6 camera 80 mm which is the diagonal of the filmsize. Normal in a digicam with a very small CCD is around 15 mm.
Now we will have a look at the effects of the use of certain lenses.
Wideangle lenses
A normal lens is called normal because it captures a scene just as the human eye does. In the right perspective and on the same distance as we experience looking at a scene. Objects in the scene look normal in their spacial setting.
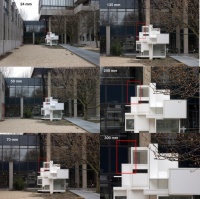
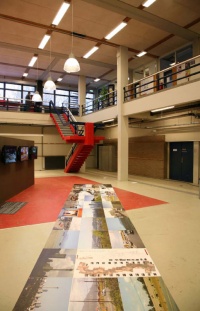
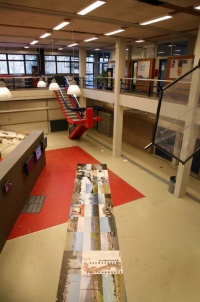
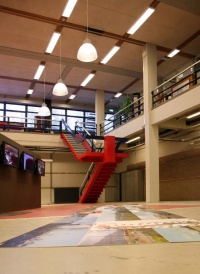
A wideangle lens shows from a certain point a broader, wider view of the scene. There is much more information in the image but everything is shown smaller. ‘’Wideangle lenses are much used in architecture photography, especially in interior photography because they show a space with a much wider angle.’’ You will have to use this lens carefully however because of the fact that you will get distortions sooner then with a normal lens. When you do not hold a wideangle lens parallel or straight you will have the effect that a building is falling over or that walls are not parallel. When you keep the camera parallel all vertical lines will stay parallel but as soon as you tilt the camera up or down the lines will converge. You can of course use this effect to your advantage. To get a strong idea of height you can point the camera up to a high building to emphasise the height.
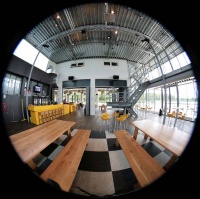
Because objects, closer to the lens are shown bigger thanthose further back you get a different perspectiv.e This distortion in the apparent size of an object can deliberately give emphasis and even an unrealistic appearance to a scene. Wideangle lenses have a shorter focal length than normal lenses. At 35mm reflexcameras they range from 35 mm to approximately 15 mm. There are still wider angles, such as the special superwideangle lenses and the so called fisheye lenses with a focal length up to 180 degrees but they give a very distorted picture with limited use.
telelenses
Telelenses have a longer focal length than normal lenses and with these lenses you can enlarge an object from a certain point. It is as if you pull them closer to you. The range of telelenses is from 70mm up to 500mm. Even longer lenses are the super telelenses up to 1200mm. ‘’these are used in sports and wildlife photography. In architecture photography they are not much used except in special cases.’’ The effect on the perspective is that the scene is compressed. It seems that everything is very close together. A telelens has less depth of field than normal and wideangle lenses. You will have to focus very careful and you will also suffer more of movement of the camera of the camera so be aware of this. When you work with a telelens without a tripod you will have to work with fast shutterspeeds to compensate for this movement. Lately they have developed telelenses with an image stabiliser to compensate for the movement of the camera so you will be able to work with longer shutterspeeds.
Short telelenses are often used in portrait photography because they show no distortion and youcan make photo’s without having to get to close to your model. Because of the smaller depth of field you can focus on the most important part in a portrait being the eyes and use this to your advantage.
tilt and shift lenses
There are also some special lenses in photography. I already mentioned super wideangle lenses fisheye lenses and supertele lenses. Especially for architecture photography there is a so called tilt and shift lens. This lens can be adjusted in two different ways to compensate for certain perspective faults. By shifting the lens up while keeping the filmplane parallel to the building façade it is possible to photograph a building without converging lines. Technical cameras can do this as well and even better because they are specially built for this purpose. A disadvantage of these technical cameras is that they are big and it takes a long time to make a photo.
The second effect of this lens is the possibility to tilt the lens. You can turn the front part of the lens from the film plane to achieve a very large depth of field without having to close the aperture. This is done by tilting the lens in the same direction as the subject. This can be very useful in photographing architectural models.
macro lenses
Macrolenses are specially designed lenses for close-up photography. Because of the way they are designed with a longer extension and special lens construction, you can get very close to a subject and still focus. ‘’They are widely used in nature photography (flowers, insects) and medical photography and in musea because of their ability to capture scenes very close up without distortion.’’
perspective
When we make a photograph we are showing a special form on a flat plane. The rules or laws that occur by this translation as well as the spacial suggestion that can show off a flat image is called perspective.
The perspective effect of a photograph can be influenced in different ways.
- by changing the point of view.
- ground or eyelevel view
- birdseye view
- wormseye view
- by choosing a certain lens
A wideangle lens will have a stronger effect on the perspective than a normal lens.
We can use the different perspective effects to achieve or suggest depth in an image.
- objects further away from the camera seemto be smaller so it suggests depth and distance.
- Overlap. When an object covers another object partly it is considered normal that it is closer to the camera.
- The difference sharp-unsharp. In the distance we only see one zone to be sharp. Objects in front or in the back of this point are more or less out of focus. The difference sharp-unsharp becomes a sign of depth in this natural way of looking at things.
- The placing of an object in the image. The higher we place the subject in the image the more strongly there will be a feeling of depth. This happens because when we look at a subject placed so high in the frame we have to pass a vast area of foreground. We have to look in the distance to see the subject.
- The difference between dark and light. Because of light diffusion in the atmosphere objects seem to be lighter when they are further away. A light tone suggests distance because of this effect and darker tones suggest to be closer by.
- Air perspective. This is the impression that you get in a photo due to the diminishing of contrast that you get as a result of atmospheric circumstances. Especially in back light or when it is misty this gives a strong impression of depth and distance.
- Color perspective. This is the effect that the so called warm colors (yellow orange red) draw attention in an image. They seem to come forward while. the cool colors ( blue blue/green) seem to go backwards.
The difference of lenses with a different focal length from a certain point have no effect on the perspective. ‘’By changing your point of view the perspective does change.’’
In using all these possibilities we can determine ourself the special effect of our images and in doing so make better images.
useful links
photography tutorials
digital photography tutorials
camera reviews
